Today we have a guest post from Lucy Ravitch, author of the new Kickstarter picture book Trouble with Monkeys: A math concept story of place value. She’s sharing a few ideas from her Math Activity Thursday (M.a.Th.) video series. Enjoy!
Hello, math fans and enthusiasts! Each week I try to give you and your family a fun math activity to try. Two months ago I posted this video with ten ways to turn play dough into an engaging activity for lower and upper elementary math.
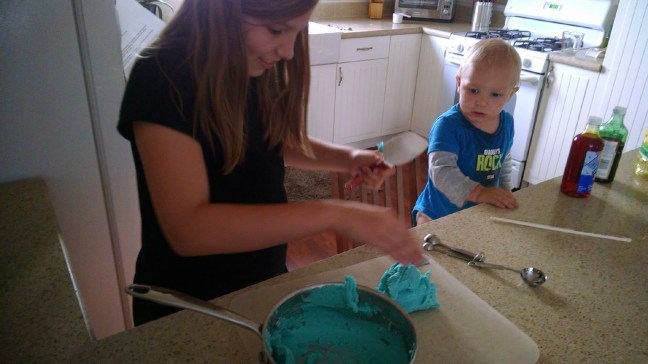
If you want to make your own dough from scratch here are a few simple recipes. I encourage you to let your children play freely at first, before trying these activities.
Below I have identified some of the math concepts that your kids will experience as they play.
1. Toss It
Practice counting. With older children, record your results and make a graph of the data.
- How many times can you catch it in a row? What’s your average number of tosses?
- Talk about attributes. Does the size or color of the play dough balls make a difference?
- How high are you tossing it? Talk about measuring systems. Do you use feet and inches, or meters and centimeters?
- If you know how to juggle, time how long you can keep the balls going.
2. Smash It
Make several small balls or pieces. Then play as you smash them.
- Play a NIM game: Make 10-15 small play dough balls. Take turns. On your turn, you can smash one ball or two. Whoever smashes the last ball wins the game.
- Or smash your math facts: Choose several equations for your children to practice. Write each answer on a 3×5 card. Lay out each card next to a play dough piece. As you call out the equations, kids smash the play dough next to the correct card.
3. Shape It
Have fun molding your play dough. Roll it out to cut shapes.
- Try making 3D shapes while practicing your math vocabulary. MathisFun.com has a great section about solid geometry. Can you find three math terms that are new for you?
- Roll out the dough and cut 2D shapes. Discuss their attributes. Can you cut your shape in half to be symmetrical?
4. Hide Things in It
Find small objects around the house and enclose them inside play dough.
- Take turns hiding small objects in play dough. Optional: Give a one-minute time limit to guess before opening it. This gives you and your kids a chance to talk about size, shape, or other attributes.
- Have challenges to use the least amount of dough to hide identical objects. Two players have two minutes to hide an object in as little play dough as possible. The object must be completely concealed within the dough. What methods will you use?
5. Make Imprints on It
Show off your design skills and observe textures.
- You can practice counting as you poke and press your fingers or objects into the dough. Older children can discuss the distance between impressions and/or the pressure applied.
- As you and your kids make designs, talk about what you notice: Is your design symmetrical? What tools did you use (toothpicks, pencils, marbles, fingers, toy cars)? Which objects make interesting textures?
6. Cut It
Use a butter knife or the edge of a ruler to cut your play dough. Discuss findings as you play and explore.
- In the video, I posed the question: how many sections do you get if you make only three cuts? Try it and see.
- Does the number of pieces change if you use a shape other than a flat circle?
- Discuss making straight cuts that will intersect or be parallel. Bring in more geometry terms.
- Experiment with a different number of cuts.
7. Weigh It
Pull out a kitchen scale or balancing scales to use with dough.
- Older children can make conversions between ounces to grams. They can make calculations about doubling or multiplying the measured weight. With younger kids, try using balancing scales. Compare the weights between pieces.
- Try making two pieces that weigh exactly the same. This is harder than it sounds! For small children, this gives them the opportunity to see that the mass (weight) of an object can come in different shapes.
8. Measure It
Use a ruler or measuring tape while you play. There are several ways you can measure your dough — height, width, and length.
- How long can you extend one ounce of dough? Pick your own size/weight of play dough and see who can get the longest. What fraction of a yard or meter is it?
- Discuss height and what it takes to make dough stand vertically. How tall can you get three ounces to stand? Can anything help make it taller?
9. Roll It
Make sure you have plenty of room for this activity. Playing outside or on smooth floors works best.
- With one push how far does your play dough roll? Is there an ideal size for a piece? Is there an ideal weight for rolling?
- Is the ground sloped? What effects does the rolling surface have?
- Why do some shapes roll easily while others don’t? Can you create a not-round shape that will roll?
10. Compare It
Compare similarities and differences between dough colors and types. Consider comparing the previously listed activities
- If you made your own dough, compare consistency between batches. Is homemade dough denser or lighter than store-bought dough?
- What are differences between the dough you played with and the dough that has not been touched?
- Which of these activities do you think will take the shortest amount of time? The longest? Or put the activities in order based on how much dough you will need — least to greatest.
May you and your students have fun as you play with dough!
About the Author

Lucy blogs at kidsmathteacher.com and is the author/creator of Kids Menu Books. The first book in that series is The Pancake Menu, an interactive book that lets kids practice math as they play restaurant.
And be sure to visit Lucy’s Kickstarter project! She’s teamed up with artist Trav Hanson to create the delightful picture book Trouble with Monkeys: A math concept story of place value.
